 virtualhome.blog My blog about virtualized infrastructures, backup and disaster recovery topics and the cloud !
Related Articles

An .OVF file refers to the “Open Virtualization Format”, which is a standard regarding packaging to address the portability and deployment of virtualization appliances.
Here is the source of this standard: DMTF OVF
An .OVF file or package consists of a number of files like a descriptor file, an optional manifest file, certificate files, optional disk images and other optional resources like ISO images.
The optional disk image files are mostly VMware .vmdk files. However, an .OVA file is a single file where all the contents of an .OVF file is stored. Furthermore, the .OVA file is based on a tar archive containing all the .OVF package files.
In this Blog Post I wanted to share how to modify an .ova appliance file to adjust it to someones needs.
What do I want to achieve here ?
Lately, I had the task to roll out a lot of appliances for a specific vendor. The .OVA appliance of this specific vendor, consists of six virtual disk images. Since I only needed the first virtual disk image for my purposes, I thought I’d try to modify the .OVA file instead of editing all the virtual machines which would have been rolled out with it. I simply wanted to do the work before rolling out the virtual machines and not afterwards. So due to my purposes, I needed to delete the 5 other disks, which I didn’t need for my work and repackage the whole set of files again. After repackaging the .OVA appliance, I’m able to simply roll this appliance out, without all the disks and save me a lot of work. Have fun on reading how to modify an .ova appliance file!
Install the VMware OVF Tool
For unpacking and repackaging the .OVA file you will need to download and install the latest “OVF Tool”. The setup of this .msi is fairly easy, just click through the installer.

Optional, you can add a new environment variables and add the OVF Tool (C:\Program Files\VMware\VMware OVF Tool\) to the “Path” system variable:
Therefore, navigate to the environment variables of your Windows system, and add a new entry under the system variable “Path”.

Unpacking the .ova appliance file
Now, that we have installed the OVF Tool and also have set the environment variable, we can simply unpack the .OVA file with the OVF Tool. To do so, navigate to the folder, where your .OVA file is located and hit the following command:
ovftool.exe --allowExtraConfig --skipManifestCheck "MY_TEMPLATE.ova" "MY_UNPACKED_TEMPLATE.ovf"
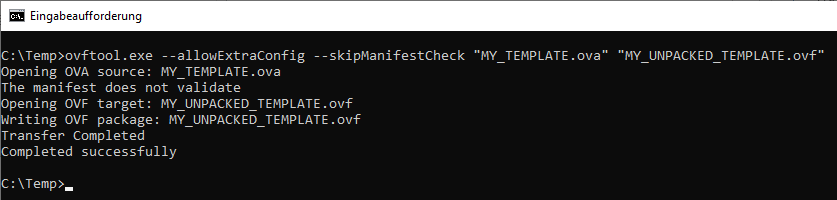
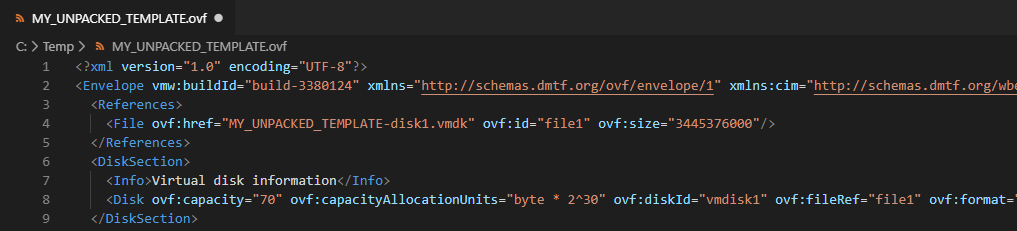
Depending on the size of the .OVA appliance file, this could take some amount of time. After the command finishes sucessfully, you are able to see all the files from your .OVA appliance file in the directory. In my case, there are all the virtual disk images (which I don’t want), a manifest file and the .OVF file which descibres the configuration of the virtual machine being rolled out. The parameter –allowExtraconfig means, that extra configuration options are allowed in the whitelist. The –skipManifestCheck simply skips the validation of the OVF package manifest.
Modifying the .ovf file to our needs
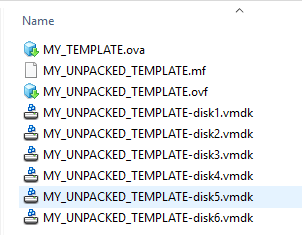
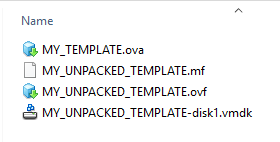
The first step I need to do is simply delete the 5 virtual disk images, which I’m not going to repack again ! So my folder looks like this now:
After deleting the not needed virtual disk images, we need to edit the .OVF file to exclude the deleted virtual disk images out of the configuration. We will need to delete the references of the virtual disk images, the virtual disk information and the single item information for the virtual disk images. Accordingly, edit the .OVF file with an editor of your choice, whereby I’m using VS Code.
First of all, we are going to delete the lines out of the .OVF file regarding the virtual disk image references and the virtual disk information. The lines that have to be deleted from the .OVF file are framed in red.
Before:

After:
As you can see, I deleted all the references to the virtual disk images and the virtual disk information entries aswell. The only virtual disk image left, is the information regarding “Hard Disk 1”.
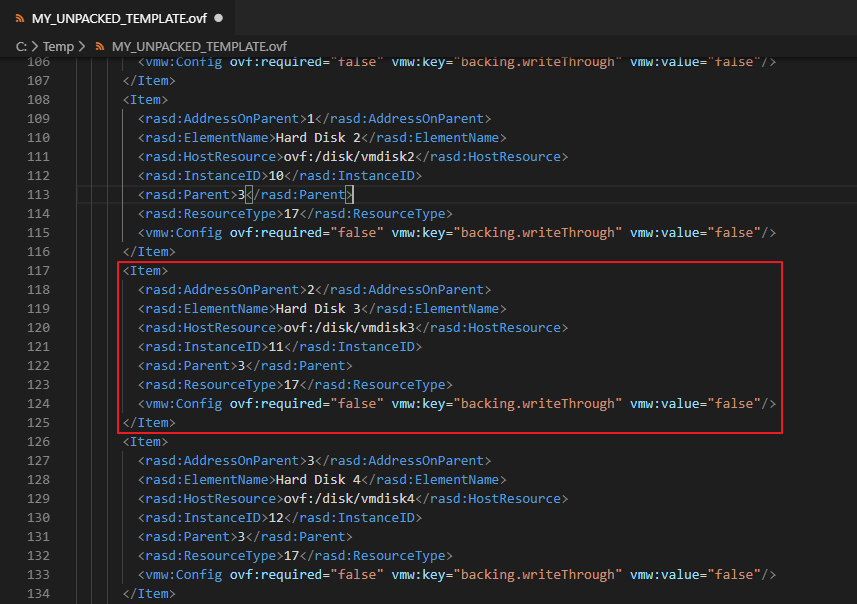
After we have deleted the virtual disk image references and the virtual disk informaton, we can continue by deleting the single item information for the virtual disk images.
Before:
After:
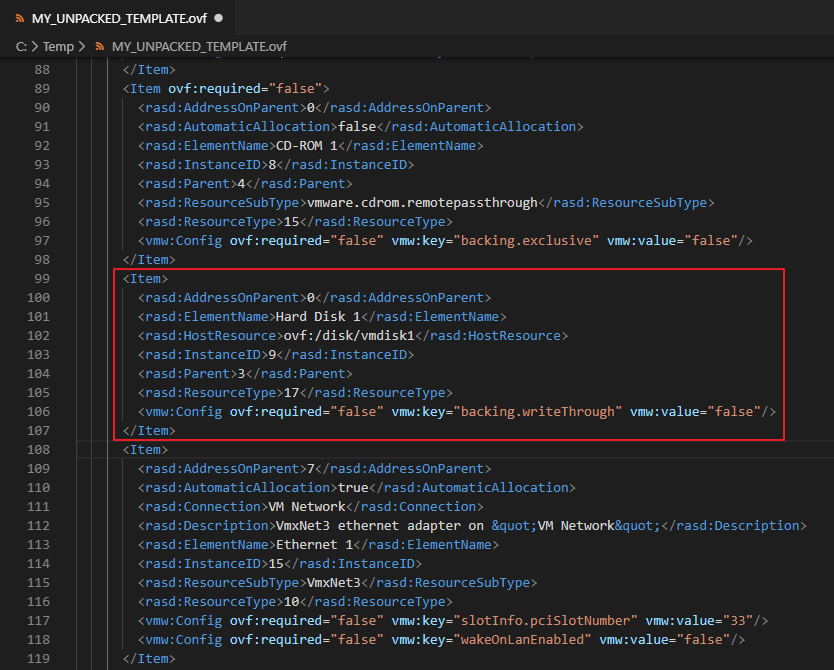
As you can see, I deleted all the items for virtual disk images I don’t need and left over the item for the “Hard Disk 1”.
Generally, make sure to watch out for the brackets and indentations otherwise you may experience issues when repackaging the .OVA file.
Modify the manifest (.mf) file to our needs
After we have modified the .OVF file, we need to head for our final step which is editing the .mf namely the manifest file. The manifest file contains all the items which are being packed together within the .OVA file and the relevant SHA256 checksum of each file. Our manifest file looks like this at the moment:
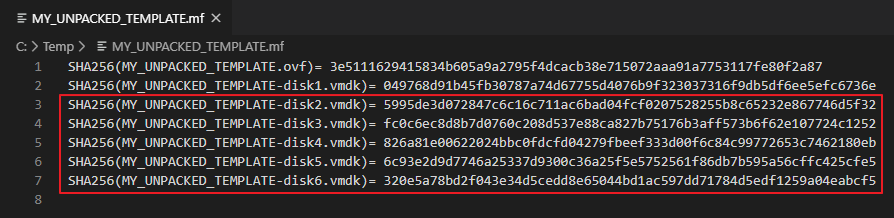
Framed in red are the disks which I remove from the manifest file, as I dont need them. The manifest file looks like this after deleting the files:

Now, that we have adjusted the .OVF file and the manifest file, we need to do one last step before we are able to repackage the .OVA again. As we edited the .OVF file and deleted content out of it, the SHA256 checksum has definetely changed. We need to recalculate the SHA256 checksum of the .OVF file to update it in the manifest file. Otherwise we will encounter issues while repackaging the .OVA file. I love to use PowerShell for checksum calculation and checking, so I’m going to show you the “PowerShell way” of doing this. By the way, have a look here at my PowerShell File Hash Calculator Script which I created recently.
Therefore, leverage the following PowerShell command, to recalculate the SHA256 checksum of the .OVF file:
Get-FileHash .\MY_UNPACKED_TEMPLATE.mf -Algorithm SHA256

Copy the calculated hash value, and finally place it in the manifest file next to the line of your .OVF file.

Repackage the .ova appliance file again
Now that we have edited all our files and adjusted it to our needs, we are finally ready to repackage the .OVA appliance. Therefore, we are using almost the same command as for the unpacking, but with an target of an .OVA appliance.
ovftool.exe --allowExtraConfig "MY_UNPACKED_TEMPLATE.ovf" "MY_NEW_TEMPLATE.ova"
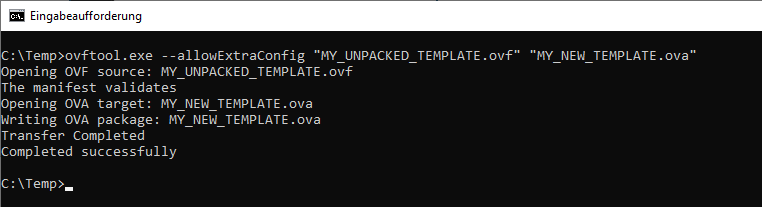
Tada ! It worked, which means I did not forget any brackets or have a wrong checksum. The result looks like this 🙂

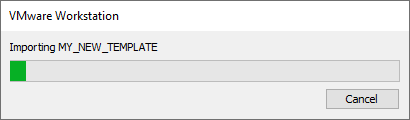
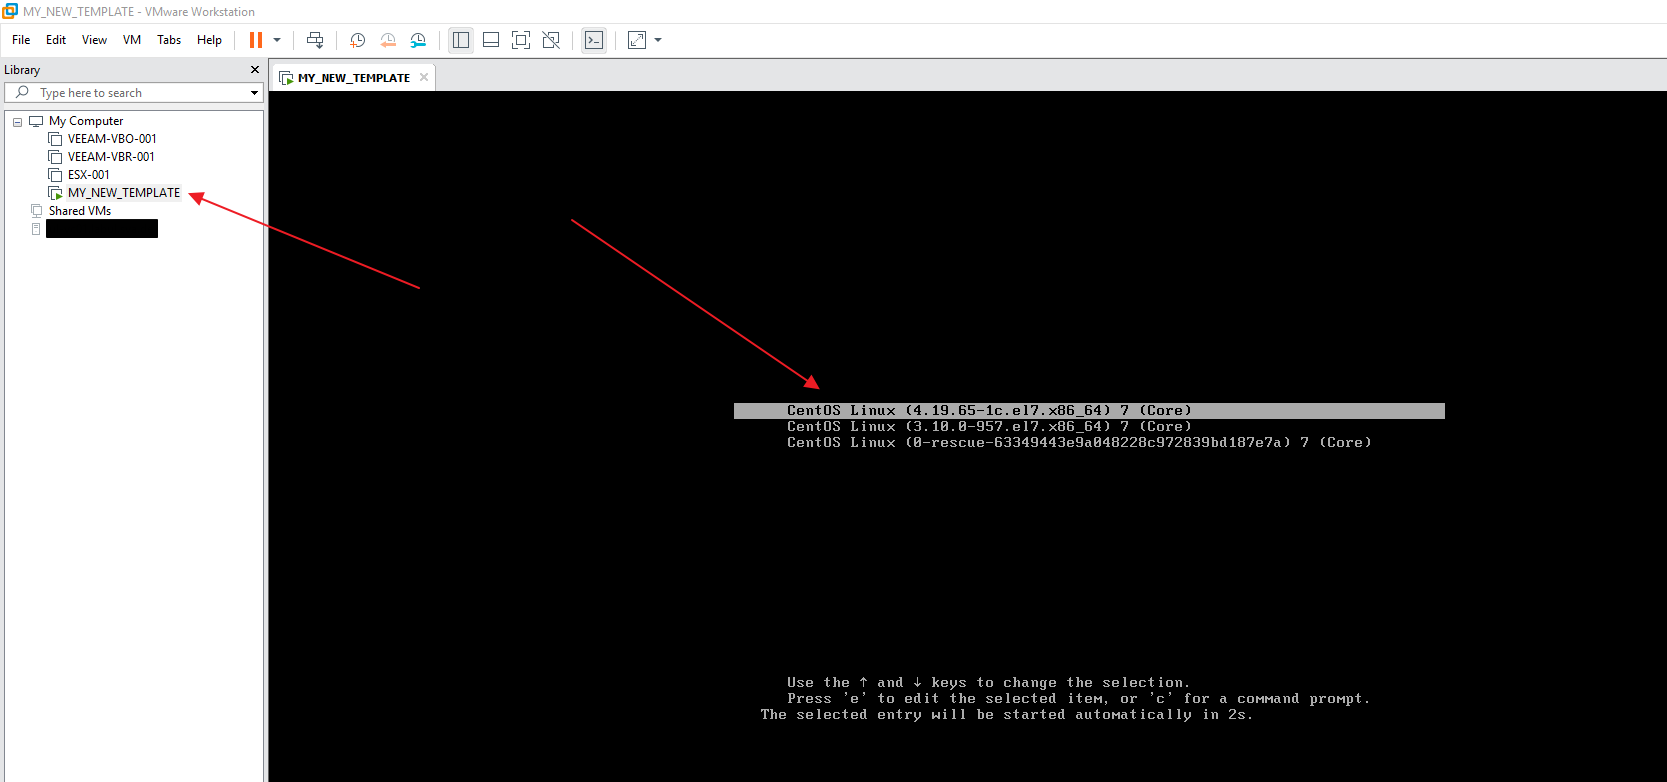
Does it work ?
To prove, that the modified and repackaged .OVA file is deployable, I got some screenshot for you where I’m deploying the template within a VMware Workstation and the OS boots up !
Nevertheless, I pre checked if I can simply adjust my .OVA file by deleting the virtual disk images, so this is no recommendation for every appliance. In case of Linux LVM configurations etc. you might have a problem by simply deleting virtual disk images out of your .OVA file.
As always, thanks for reading and I hope I could help someone on explaining how to modify an .ova appliance file!

Very helpful! Thanks for the walkthrough.