 virtualhome.blog My blog about virtualized infrastructures, backup and disaster recovery topics and the cloud !
Related Articles


In this Blog Post I would like to give an overview about vSphere Tags and how to use it within Veeam Backup & Replication. This article will be an introduction on this topic, whereby I am going to write another article regarding some detailed example concepts.
General Overview of vSphere Tags and Categories
First we should set some basics. An explanation of VMware can be found here:
With vSphere Tags you can attach metadata to vSphere objects in the vSphere inventory. This could for example be helpful for searching and sorting vSphere infrastructure objects.
A tag works as a label, which can be applied, to objects in the vSphere inventory. A tag is also always assigned to a category. With categories, you can arrange and group tags together. The category itself is used for defining which objects the tags are for. You could for example create a category which only applies to virtual machines. Furthermore, you can define, that more than one tag in this category can be applied to an object (here the virtual machine).
Let’s assume, that you want to sort your virtual machines regarding the operating system. As a virtual machine can have only one operating system, you will create a category, which allows a single tag per virtual machine. Within this category you create different tags for different operating systems. We will use this demonstration tags for backing up virtual machines respective to their operating system.
Here is a quick draft, how this could look like.
| Category | Tag |
| Operating System | Windows Server 2016 Standard |
| Operating System | Windows Server 2016 Datacenter |
| Operating System | Red Hat Enterprise Linux 7.6 |
| Operating System | SUSE Linux Enterprise Server 12 SP1 |
| Operating System | SUSE Linux Enterprise Server 12 SP2 |
Let’s see which steps it needs to achieve this via the vSphere Web Client interface.
Adding Tags and Categorys via vSphere Web Client
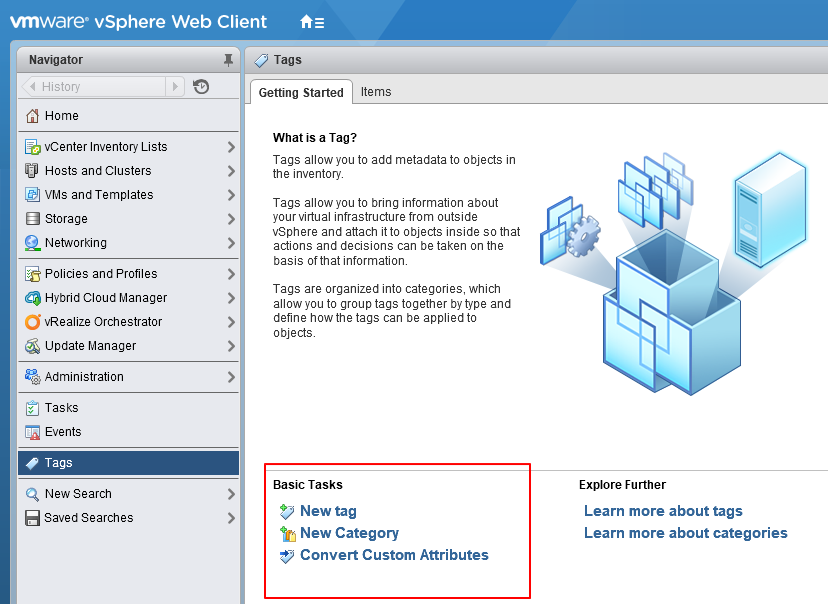
First navigate to the vSphere Tags menu within the vSphere Web Client.

Once reached the menu, you will be able to create categories and tags based on your purpose.
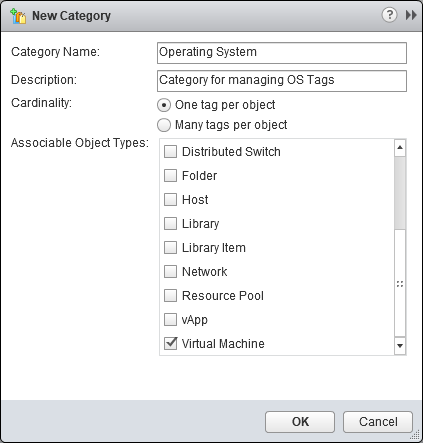
First of all we are going to create a new category for our Operating System Tags. For achieving this, click “New Category”, which will bring us the creation wizard.
After you have created your new category, you will be able to create Tags in this category. Let’s start with the Windows Server Tags first.

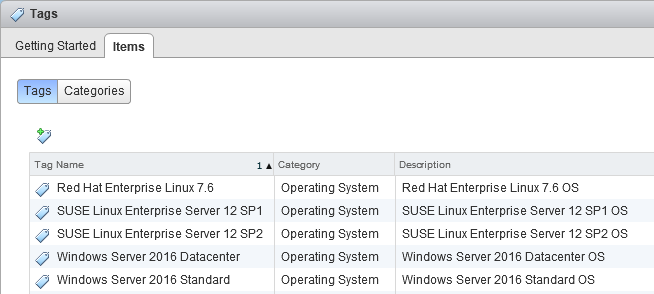
After you have created all the Tags within the vSphere Web Client, you can review them in the corresponding list.
After you have created all the tags, the final step is to assign them to your virtual machines. In my case i have a SLES 12 SP1 Kubernetes virtual machine, which i will get the right tag.
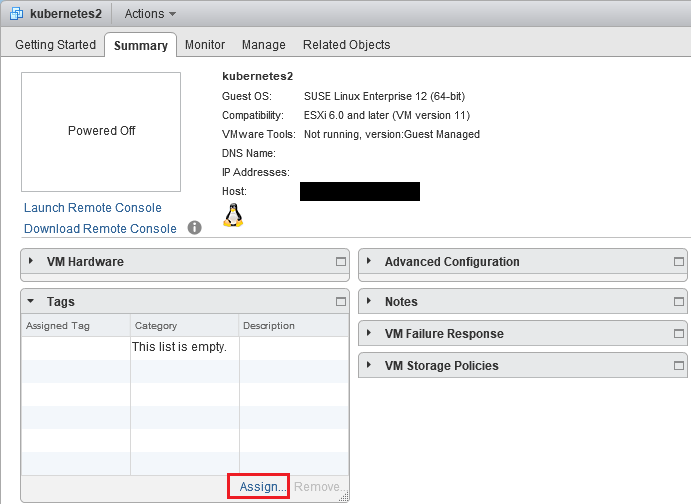
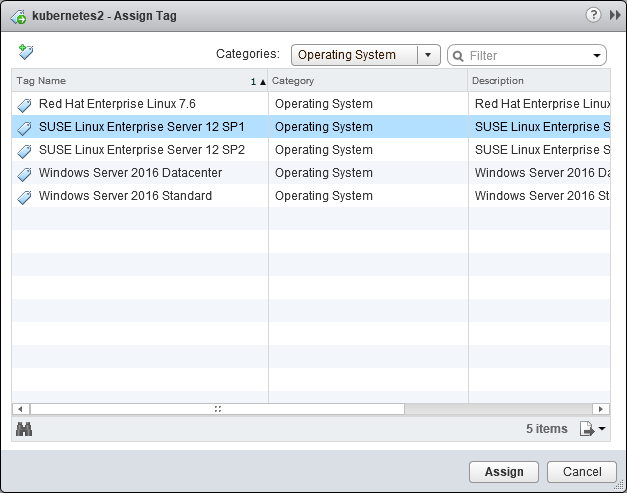
After a click on “Assign”, the wizard for assigning tags will open. While beeing in that wizard, make sure to select the needed tag for this virtual machine, which in this case is a SLES 12 SP1 virtual machine.
Creating the Veeam Backup Job
After assigning the Tag to the virtual machine, we can move on to our Veeam Backup & Replication server. In my case, i created a new Backup Job, and searched for the freshly created Tag “SUSE Linux Enterprise Server 12 SP1”.
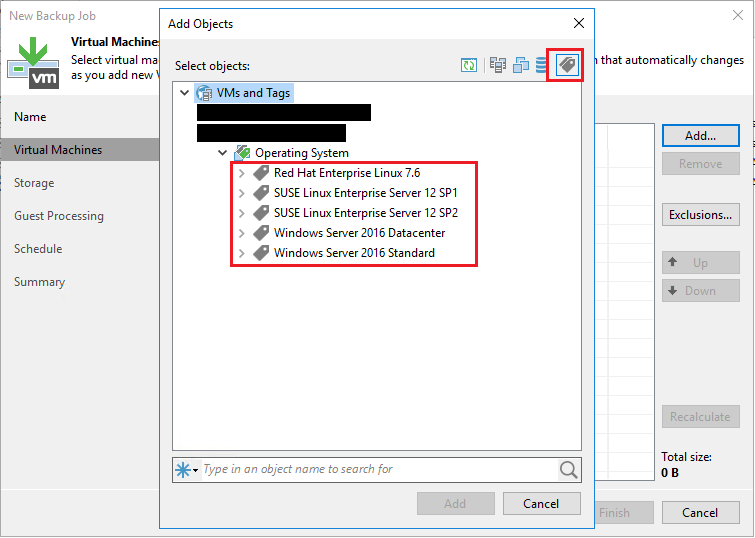
We are now able to see our newly created Tags which we can select as a source for backing up virtual machines.
Iam going to select the Tag “SUSE Linux Enterprise Server 12 SP1” here, as we have tagged the Kubernetes virtual machine with it.
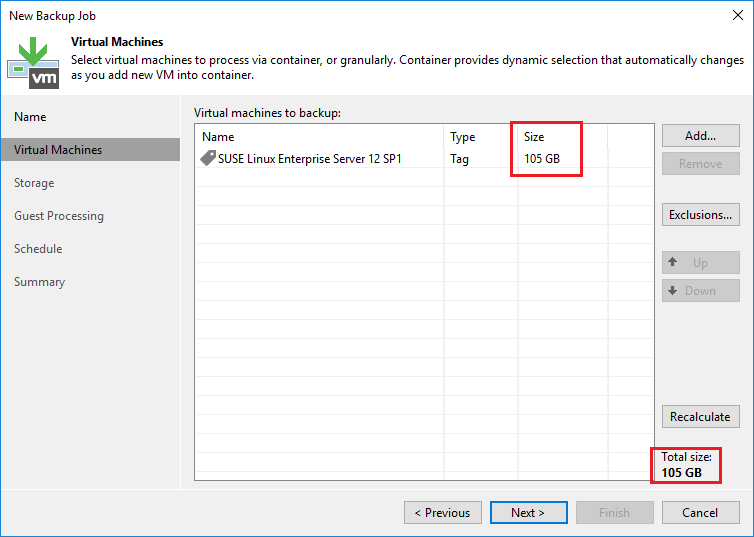
As you can see, Veeam automatically detects all tagged virtual machines and calculates their total size. Once you have added the Tag to your Backup Job, you will only need to Tag your virtual machines. Veeam will automatically detect the newly tagged virtual machines and will process them within the next backup job.
Adding Tags and Categorys via VMware PowerCLI
Before we are looking into creating categories and tags with VMware PowerCLI, i have to mention this Blog Post. The PowerCLI Module has been added to the PowerShell Gallery which is very nice when working with an existing PowerShell in seamless mode.
https://blogs.vmware.com/PowerCLI/2017/04/powercli-install-process-powershell-gallery.html
Get and assign tags to virtual machines with VMware PowerCLI
In the above section, i tagged a virtual machine named “kubernetes2” with the vSphere Web Client. The aim of this section is to add the same tag to another virtual machine named “kubernetes3”.
At first i want to display all virtual machines with the Tag “SUSE Linux Enterprise Server 12 SP1”. This can be done with the following command.
get-VM -tag "SUSE Linux Enterprise Server 12 SP1"The output will be clear, since we have set the tag to the virtual machine “kubernetes2”.

The next step will be tagging the second virtual machine named “kubernetes3” with the same tag. To achieve this, the following command can be used.
New-TagAssignment -Tag "SUSE Linux Enterprise Server 12 SP1" -Entity "kubernetes3"
If we execute another “get-VM -tag” command, we will see, that the Tag has been successfully assigned to the virtual machine.

Removing Tags via VMware PowerCLI
For the next step, we are going to remove the Tag from the virtual machine named “kubernetes2”. Therefore you can use the following syntax.
get-VM "kubernetes2" | Get-TagAssignment | Remove-TagAssignment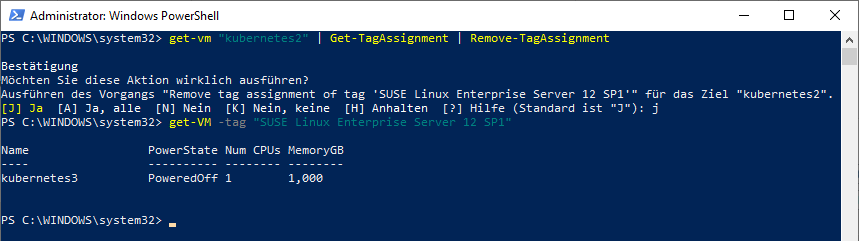
As a result, you can see that the virtual machine is missing when we are going to execute another “get-VM command”.
Adding new Tags to an existing category via VMware PowerCLI
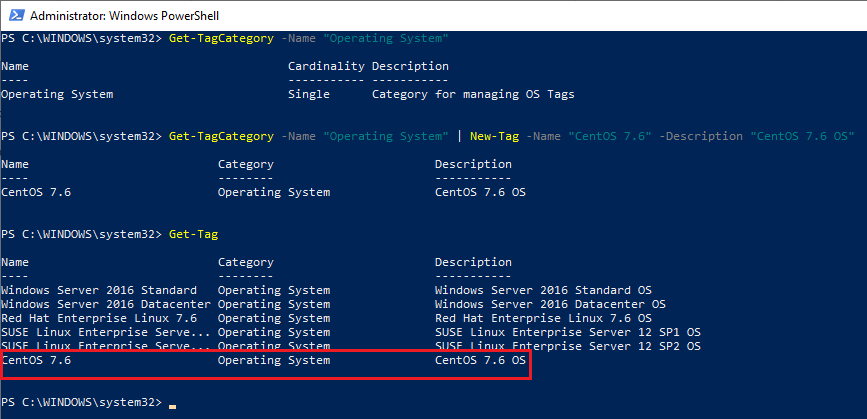
You probably want to add more tags to an existing category. In this case we are going to add another new Tag for CentOS 7.6 to our existing category named “Operating System”. This can be done with the following command.
Get-TagCategory -Name "Operating System" | New-Tag -Name "CentOS 7.6" -Description "CentOS 7.6 OS"After you executed this command, you can view all Tags with the “Get-Tag” command.
Create new Categories and Tags via VMware PowerCLI
Another part of managing tags with the VMware PowerCLI would be to create a new category with new tags. Therefore we are going to create a new category named “Disaster Recovery” and add two new Tags to it.
To create a new category you have to execute the following command.
New-TagCategory -Name "Disaster Recovery" -Description "Disaster Recovery Category" -Cardinality Single -EntityType VM
The Cardinality can be “Single” or “Multiple”. Like described in the very beginning of this post, this means that you can either assign one or multiple Tags to a virtual machine.
After the new category has been created, we can add new Tags to this category as described above.
Get-TagCategory -Name "Disaster Recovery" | New-Tag -Name "2 Site DR" -Description "Backup this VM to 2 DR sites"Get-TagCategory -Name "Disaster Recovery" | New-Tag -Name "3 Site DR" -Description "Backup this VM to 3 DR sites"
After creating the new tags in our new Disaster Recovery category, we can finally view all created Tags with the “Get-Tag” command.

I hope i could give an overview on the functionality of vSphere Tagging. Furthermore i’m going to publish another Blog Post where I am presenting some concept guides to get started with Veeam and the Tagging Feature.
Thanks for reading, and have a nice day !

One comment
Pingback: Veeam and vSphere Tag Integration with Ansible - my cloud-(r)evolution