 virtualhome.blog My blog about virtualized infrastructures, backup and disaster recovery topics and the cloud !
Related Articles


Introduction to Modern Authentication
Since the release of version 3 of Veeam Backup for Office 365, you are now able to use the so called “modern authentication”. This means using service accounts enabled for multi-factor authentication.
Therfore you will need an Azure Active Directory custom application and a service account which has MFA enabled. The custom application registered in Azure Active Directory will allow Veeam Backup for Office 365 to access the Microsoft Graph API. With this access you can collect the data from the Microsoft Office 365 organization tenant.
In this scenario, the service account will be used to connect to the EWS and PowerShell services.
Preparation
In case you want to use the modern authentication with Veeam Backup for Office 365, you need to do some preparation work.
The following steps should be done for using the modern authentication:
- Register a custom application in Azure Active Directory
- Collect your Application ID
- Create a new client secret
- Collect your Application Secret
- Create a new service account in Azure Active Directory
- Enable MFA on this service account
- Assign roles to the service account
- Collect your app assword for the service account
- Add your tenant to Veeam with the service account
In this guide i’m going to show you step by step how to configure the modern authentication.
Register a custom application in Azure Active Directory
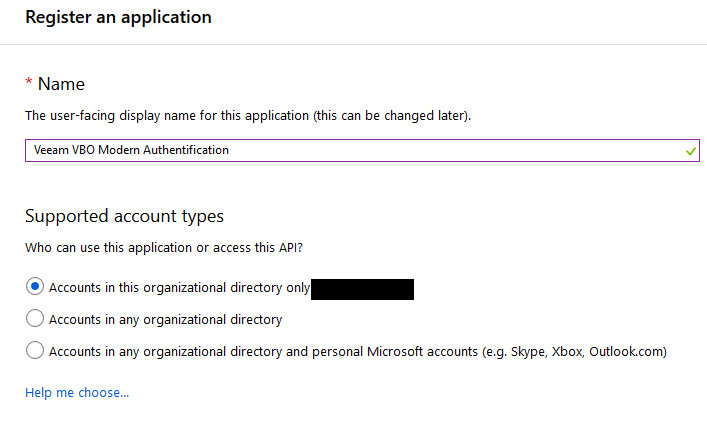
First of all, navigate to your Azure Active Directory admin center and create a new App registration.

Give your new custom application a name and choose the supported account type.
After you created the new custom application, you need to provide it with some permissions. For that navigate to your newly created application and choose the “API Permissions”.
We are now going to add Microsoft Graph permissions to your newly created custom application.
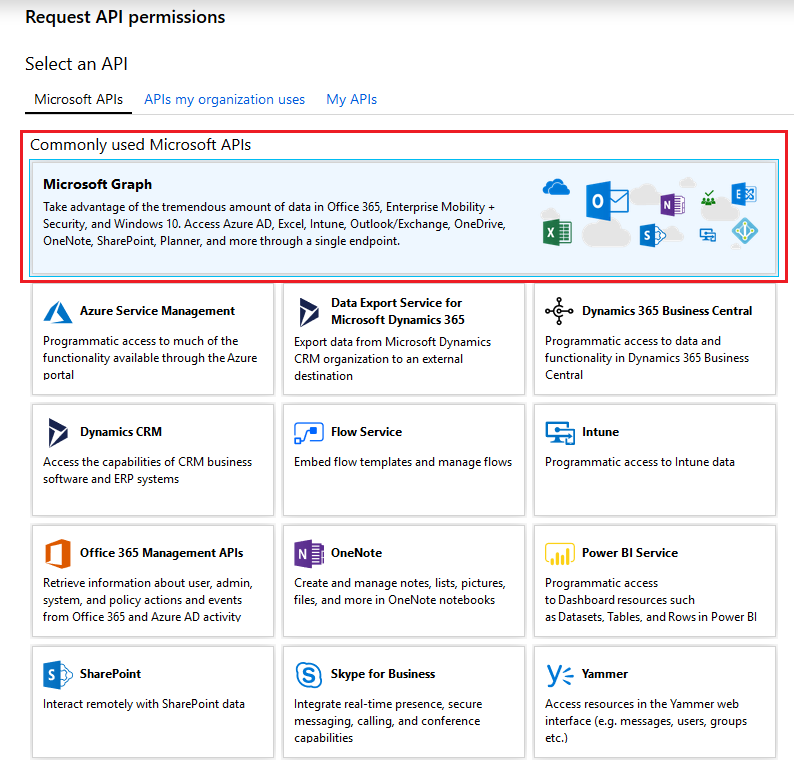
In the wizard select “Microsoft Graph” and proceed to the next step, where you will need to specify your type of permissions.

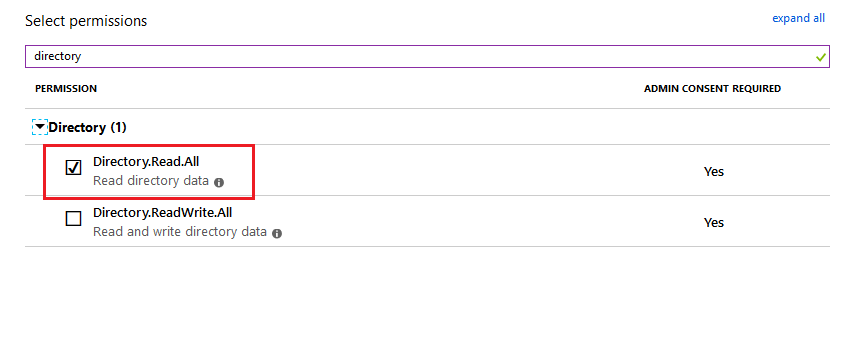
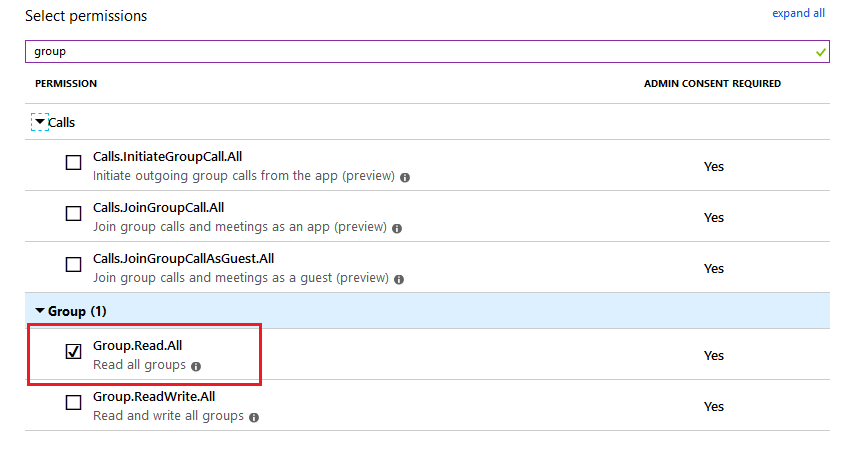
We need to specify “Application permissions”. While setting permission, search for the following 2 permissions:
- Directory.Read.All
- Group.Read.All
Those 2 permissions are needed to access the organization tenant.
After you have set the permissions for your custom application, it should look like this:
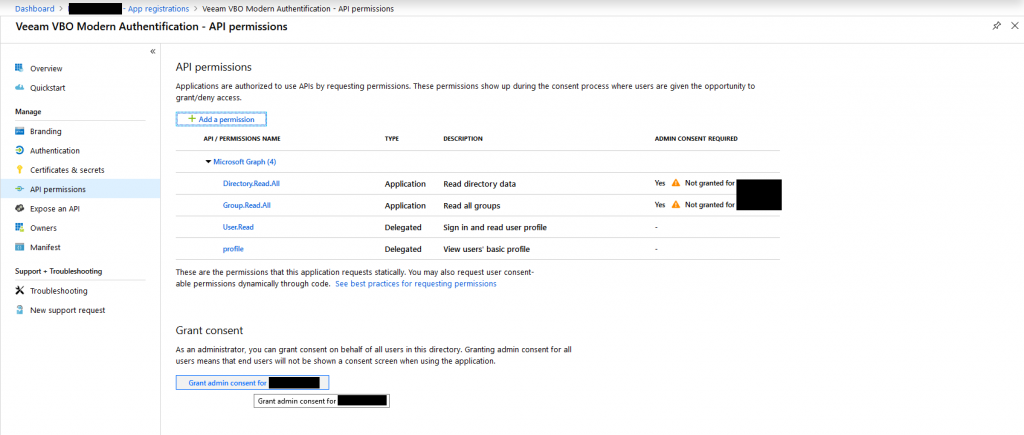
Have a look on the right side of the permissions. You will see, that there has not been granted an admin consent. For doing so, click the button on the bottom of the page.
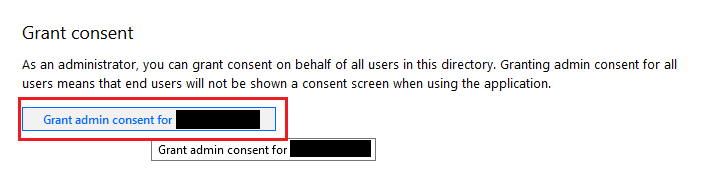
Since you are now having set all the required permissions and granted the admin consent, you are now ready to proceed. If you are going to have another look at your API permissions, you should see something similiar to this.

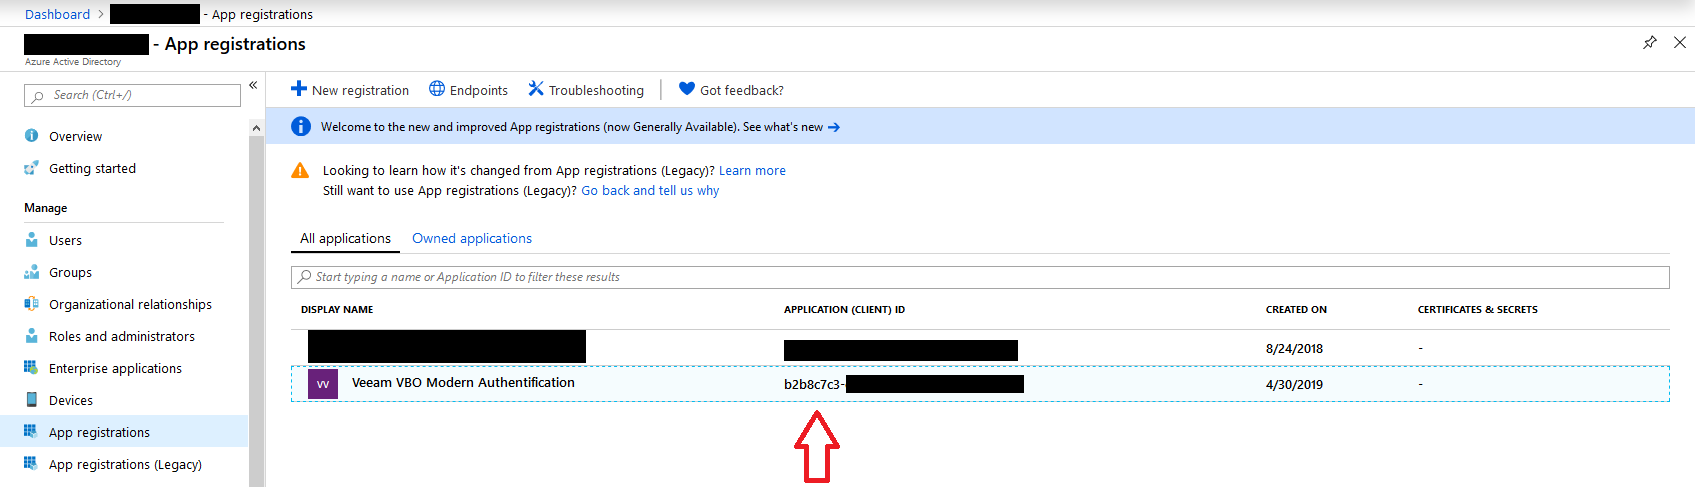
Collect your Application ID
Congratulations ! You have successfully registered a custom application in your Azure Active Directory and you have successfully set the required permissions.
The first thing you need to collect is your application ID. If you go back to the main site of the “app registrations”, you can easily copy and save it from there. The next screenshot will show you where to find your application ID.
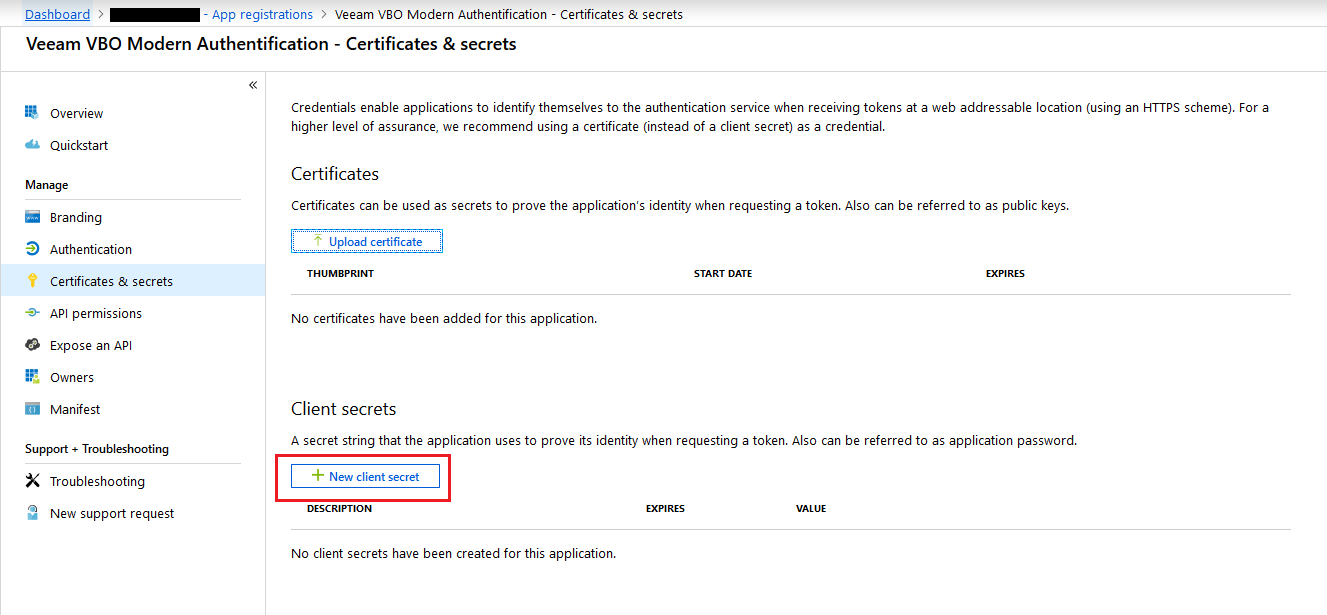
Create a new client secret
The next step is to create a new client secret for your newly created custom application. For achieving this, head to the main settings of your custom application and under “Manage”, choose “Certificates & secrets”.
From within this menu, you are able to create a new client secret.
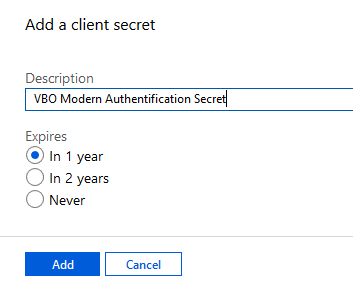
Within the “New client secret” wizard, specify a description and an expiration date.
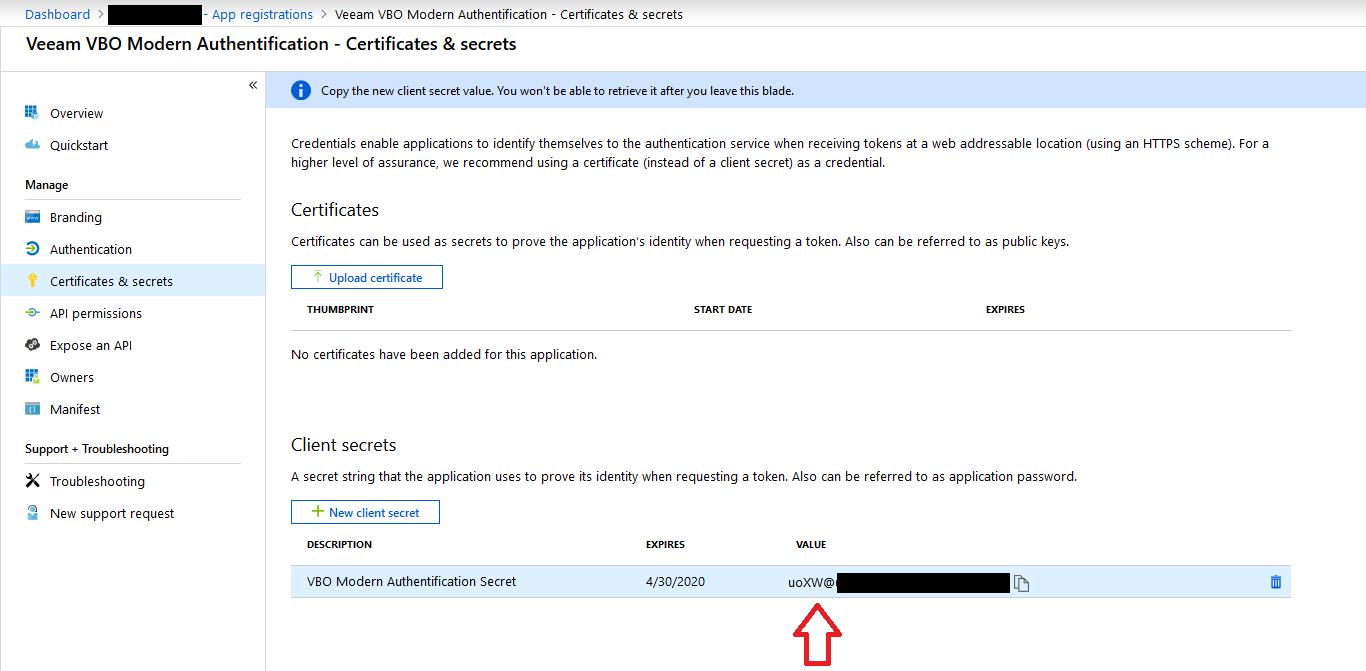
After you specified your description and your expiration date, you have successfully created your application secret. The secret can be reviewed in the main settings area of your custom application under “Certificates & secrets”.
Collect your Application Secret
To collect your application secret, move to the “Certificates & secrets” settings within your custom application and copy (and safe) the value of it.
Create a new service account in Azure Active Directory
It is now time to create the service user, which will connect from Veeam Backup for Office 365 to your tenant. In the Office 365 admin center, head for creating a new user without a product license.
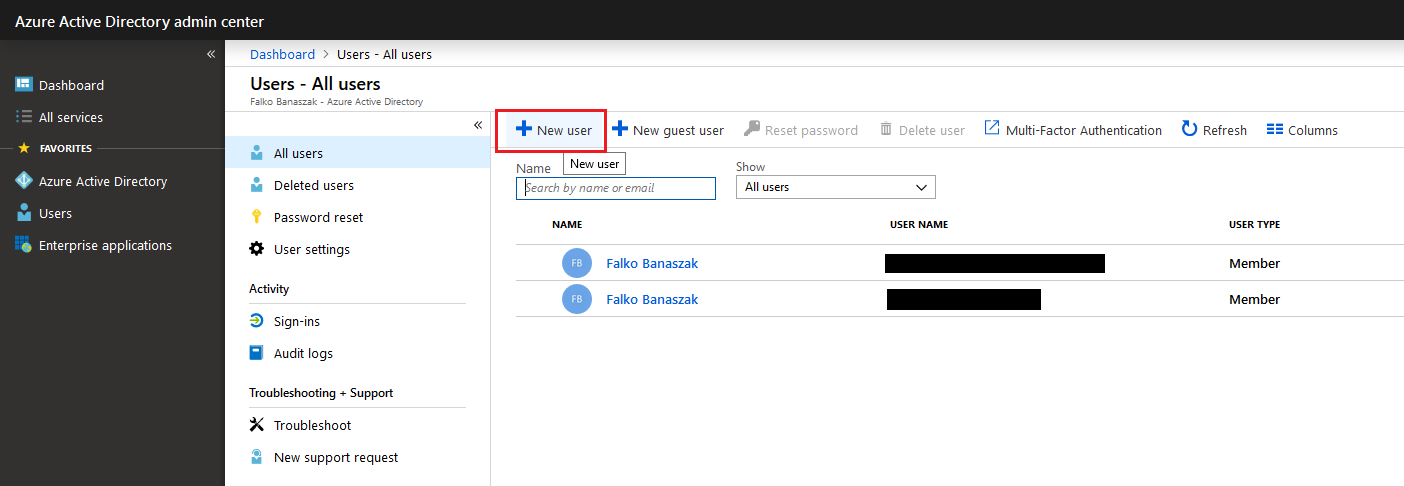
The user which we are going to create will be our service user for MFA.

In this case the user will be named “veeam_vbo”
Enable MFA on this service account
After your service user has been created, you can now proceed with activating MFA for it. Navigate to the “All users” overview within your Office 365 admin center and select your newly created service user.
On the top right of the ribbon, choose “Multi-Factor Authentication”
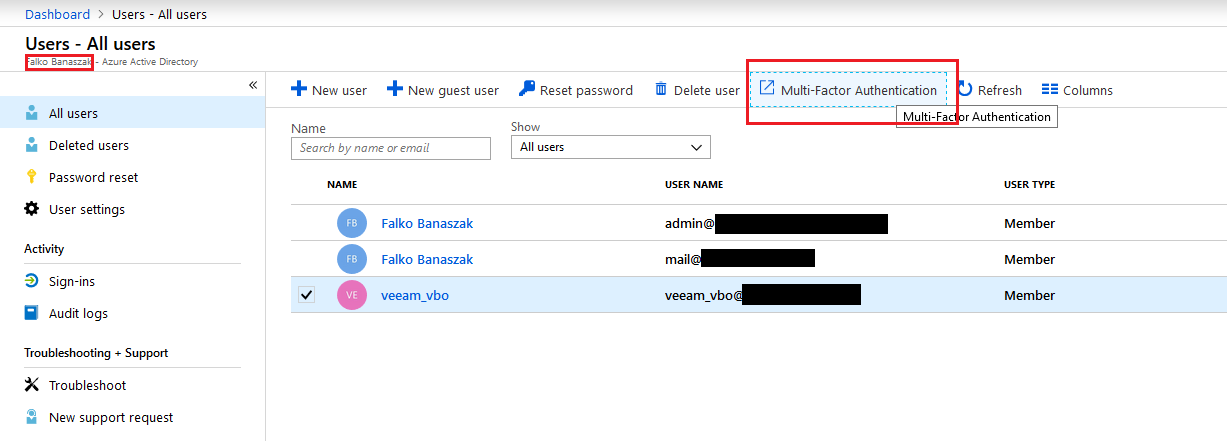
After clicking on “Multi-Factor Authentication”, you are brought to a user overview with which you are able to enable MFA for your user.
Select your service user on the left side and enable MFA on the right side.
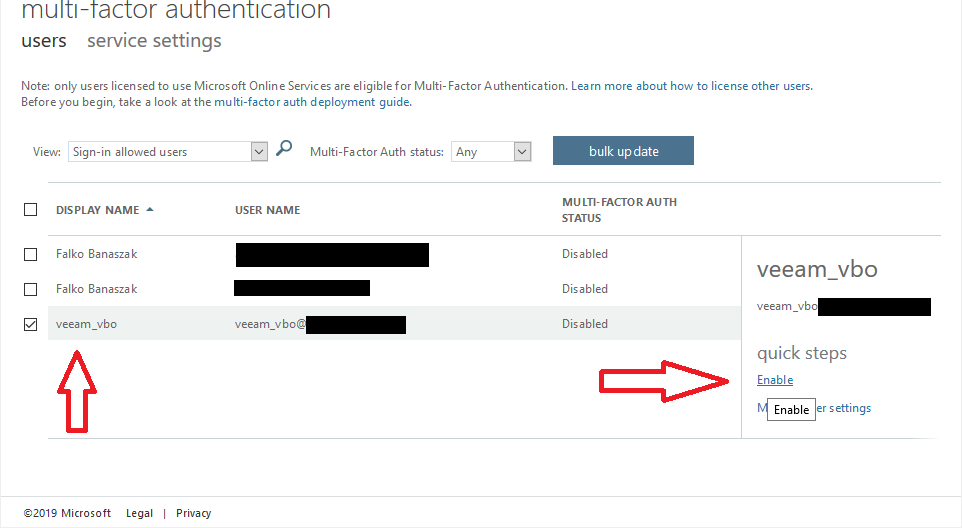
If you click on “Enable”, you are prompted to accept the enablement.
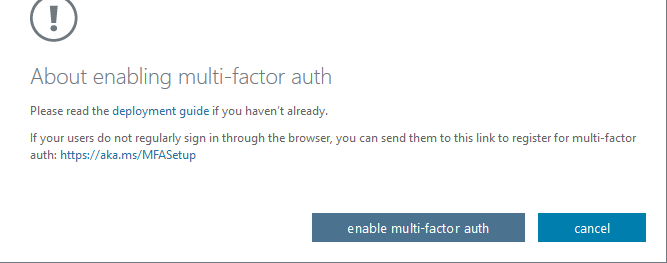
After you click on “enable multi-factor auth”, the account is finally enabled for MFA.

After a click on “close”, you can review your user which is now enabled for MFA.
Assign roles to the service account
Finally, your user needs the correct permissions and roles to backup Exchange Online and SharePoint Online. You have the choice to do this via the Exchange Admin Center or via PowerShell.
For Exchange Online you need the “Global Administrator” or “Exchange Administrator” role. Additionally you need the ApplicationImpersonation role.
For SharePoint Online you need the “Global Administrator” or “SharePoint Administrator” role.
The roles can be assigned via the “Directory roles” out of the “All Users” Dashboard within your Admin Center. In my case i have assigned the “Global Administrator” role to the service account.
I did this for testing purposes and for this blog post. I would not recommend to use the Global Administrator in a production environment. Either use the “Exchange Administrator” and the “SharePoint Administrator” role itself.
For adding the role to the user, navigate to your user, select it and add the role within the “Directory role” ribbon on the left hand side.

To add the “ApplicationImpersonation” role via the Exchange Admin Center, navigate to it and select the “permission” ribbon on the left hand side. Under “admin roles” click the “+” button to add a new role.
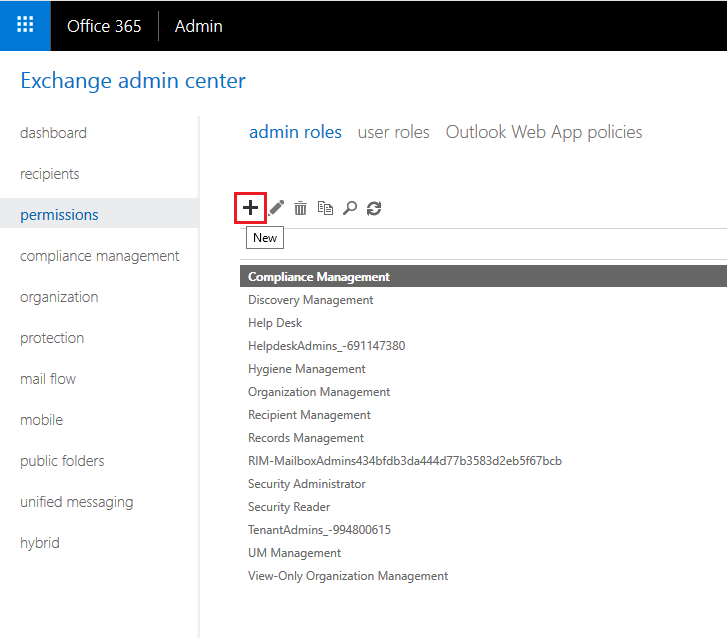
Add a role group name and an optional description. Set the Write Scope to default and after that click the “+” button under Roles to add the “ApplicationImpersonation” role from the list.
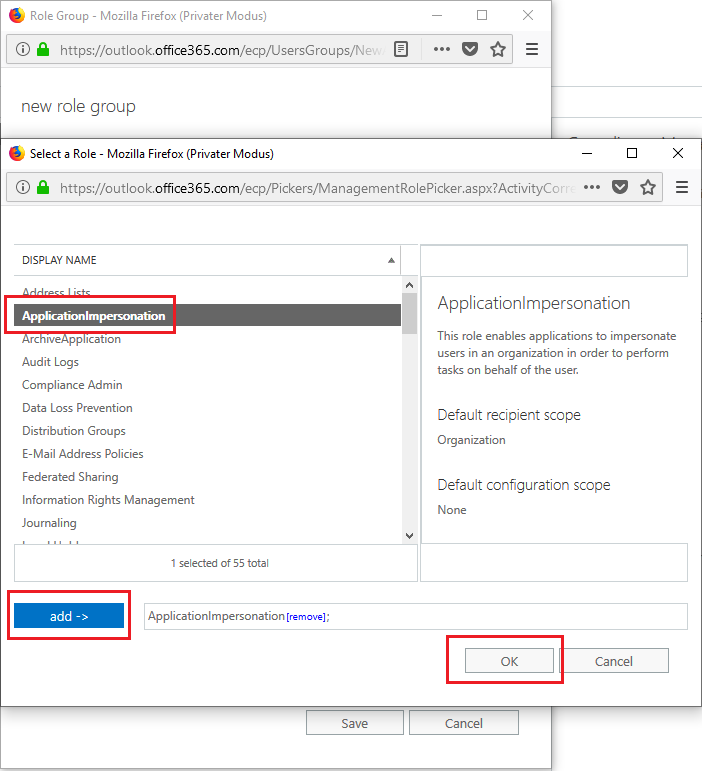
Accept the adding with the “OK” button. The next step is to add a member, meaning your service account to this new role group. For that click on the “+” button under “Members” and add your newly created service user.

Now your user has been granted the “ApplicationImpersonation” role.
Adding roles with PowerShell
In addition, you can add the roles via PowerShell. For achieving that, check the following cmdlets:
# Install the module

Install-Module MSOnline

# Connect to O365 with your admin account

$credentials = Get-Credential
$session = New-PSSession -ConfigurationName Microsoft.Exchange -ConnectionUri https://outlook.office365.com/powershell-liveid/ -Credential $credentials -Authentication Basic -AllowRedirection

# Import the session

Import-PSSession $session -DisableNameChecking

# Run these RoleAsssignment lines for the Exchange Online permissions

New-ManagementRoleAssignment -Role:ApplicationImpersonation -User: veeam_vbo@your-domain.com
New-ManagementRoleAssignment -Role: “View-Only Configuration” -User: veeam_vbo@your-domain.com
New-ManagementRoleAssignment -Role: “View-Only Recipients” -User: veeam_vbo@your-domain.com
New-ManagementRoleAssignment -Role: “Mailbox Search” -User: veeam_vbo@your-domain.com

# You can check the role assignments for your user with this command

Get-ManagementRoleAssignment -RoleAssigneeType:User -RoleAssignee:veeam_vbo@your-domain.com

# For SharePoint and OneDrive assignment use these lines

Connect-MsolService
Add-MsolRoleMember -RoleName “SharePoint Service Administrator” -RoleMemberEmailAddress “veeam_vbo@your-domain.com”
Collect your app password for the service account
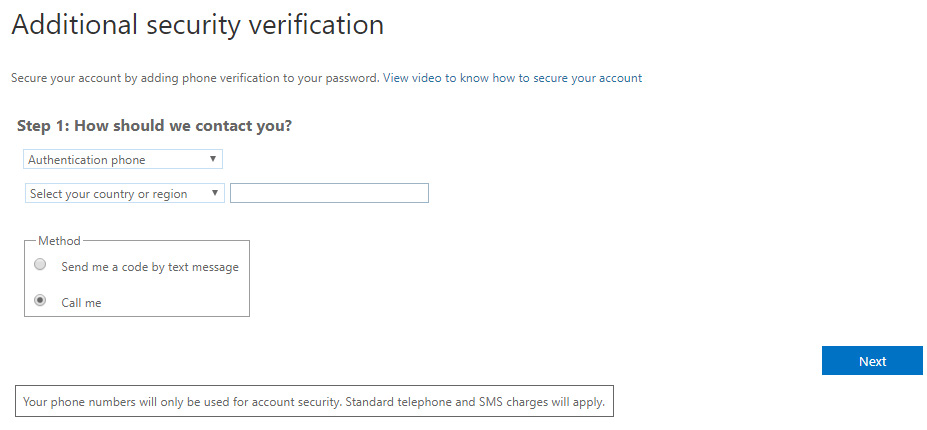
The last thing you have to do before adding your tenant to Veeam Backup for Office 365 is to collect your app password. If you have a brand new user, then login with it first and go through the additional security verification methods for this new account.
You will need to select if you would like to receive text messages or if Microsoft calls you within the configuration of the phone verfication. If you choose the option “Call me”, you will get a new app password.
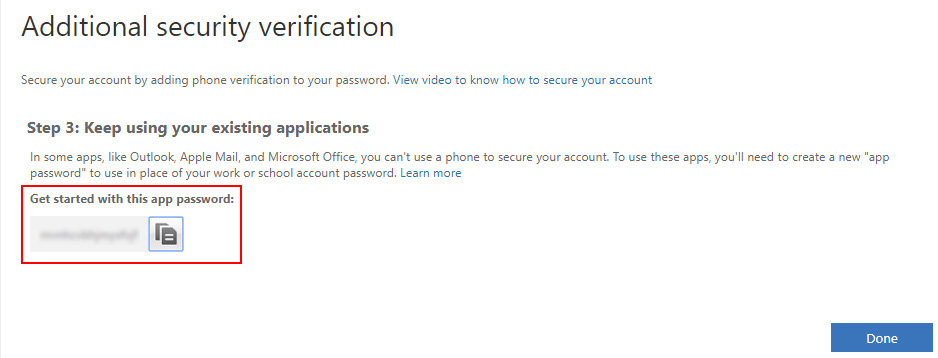
This app password is needed within the Tenant configuration in Veeam Backup for Office 365. Write it down or safe it for our later use.
If you have an existing service account, you will need to sign in with this user. In the right hand upper corner, select the settings and then “Your app settings”.
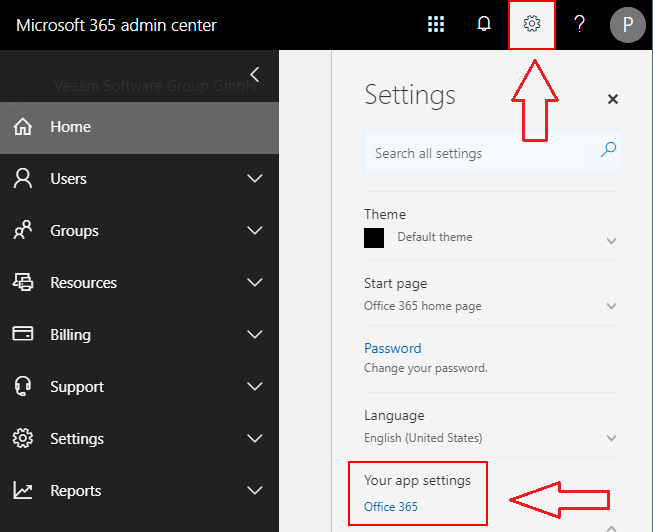
If you click on the “Office 365” link, you will be redirected to “https://portal.office.com/account”. Under this link Select the “Security & Privacy” button to create and manage your passwords.
Since i created a new user, i don’t need to do that here.
Add your tenant to Veeam with the service account
Congratulations !!
We are now ready to add our tenant to Veeam for Microsoft Office 365.
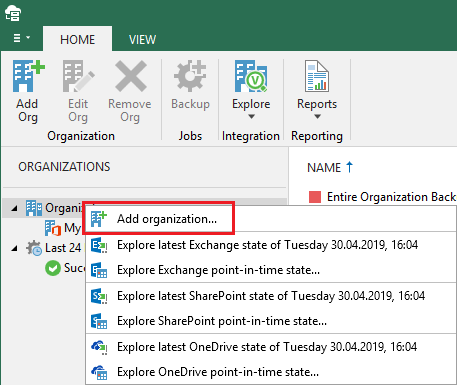
Head over to your Veeam Backup for Office 365 console and add a new organization:
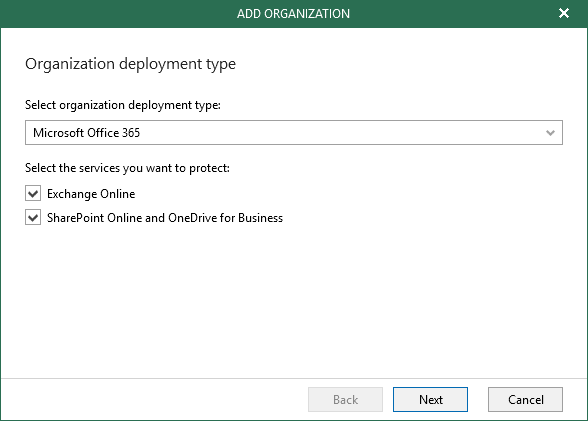
Choose your deployment type and what services you want to protect
Next is to set the region of your tenant and which authentication you want to use. Of course we are going for the modern authentication now 🙂

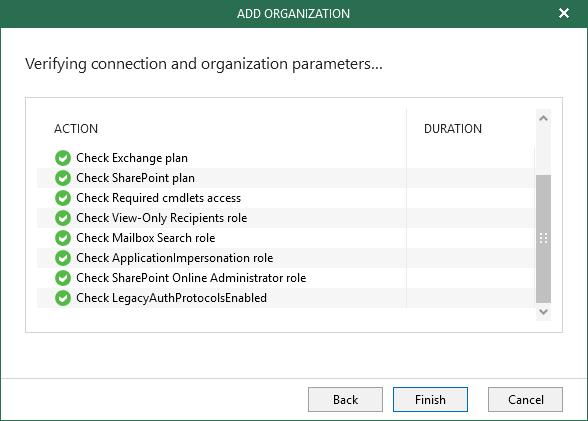
In the next step we need to provide all our collected information. Meaning the application ID, the application secret, our username and the app password.

If everything works as it should, the tenant will be added to your console successfully.
That’s it ! You are now set to use the modern authentication within your Veeam Backup for Office 365 infrastructure.
In addition i highly recommend to check the following links to get further information and instructions:
https://www.veeam.com/wp-modern-authentication-microsoft-office-v3.html
Add Org to Veeam Backup for o365 with Modern Auth and MFA
As always, thanks for reading and have a nice day !

Well presented article, but its a shame configuration cannot be authenticated across differing platforms (think of it as an SSO for platform installation and configuration).
Perhaps one day 🙂
Thank you and yes, perhaps one day 🙂
I know where you are pointing at, but remember that it might be useful to have everything independent that is related to a data protection solution.
Thanks! This was easier to follow than Veeam’s KBs.
Awesome article. Way easier than VEEAMs KBs which make it seem much more involved.